At Your Findertips the Countryman Centre Console
The iconic British brand has done something pretty daring. They essentially removed the traditional instrument cluster in front of the driver. Instead, everything you need to see and touch is now focused on one single, stunning piece of tech sitting proudly in the middle of the dashboard.
Yes, we’re talking about the Mini Countryman centre console. But this isn’t just a storage bin between the seats anymore. In this new generation, the console—specifically the central control hub—has become the absolute heart of the driving experience. It is a masterclass in minimalist design, but does it actually work for real life? Let’s dive into the details, compare the variants, and see what this “giant circle” means for you.
The Era of the Round OLED
Forget the old days of cluttered buttons and tiny screens. The 2024 and 2025 Mini Countryman models have introduced a revolutionary centerpiece: a 24 cm (9.5-inch) circular OLED touchscreen .
This isn’t just a screen; it’s a high-tech command center running on Mini Operating System 9. Based on Android, it integrates everything from navigation to vehicle settings. Because it’s OLED, the blacks are incredibly deep, making the interface look like it’s floating on the glass. The top half of the screen functions as your new instrument cluster (showing speed and range), while the bottom handles infotainment .
It’s a bold move that pays homage to the classic Mini Cooper central speedo, bringing it into the 21st century with style.
Toggles, Tanks, and Tech
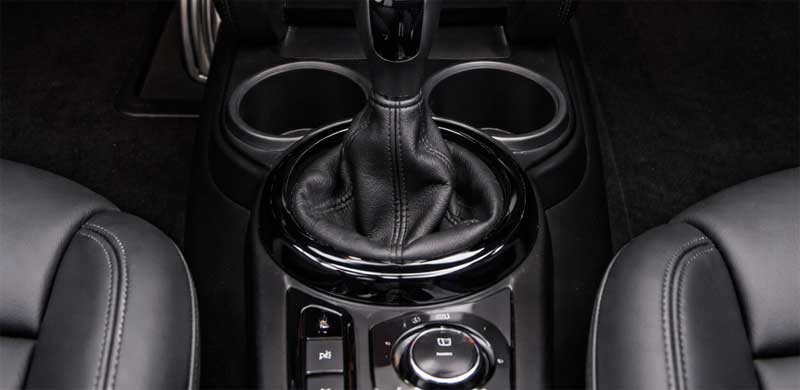
One of the coolest aspects of this redesign is what sits below that gorgeous screen. Mini has reimagined the toggle bar. Instead of a traditional gear shifter on the console, the new Countryman utilizes a small gear selector toggle located on the dashboard beneath the screen .
This frees up a ton of space on the actual center console between the seats. Down there, you’ll find the rotary dial for the Mini Experience Modes, the start/stop button, and a few other essential controls. It creates a very clean, cockpit-like feel.
However, it’s not all perfect. According to reviews, the physical storage bin inside the center console is notably smaller than in the previous generation—arguably too small to be genuinely useful for storing everyday items .
Generational Shift: 2017-2024 vs. 2025+
To truly understand the evolution, we have to look at the hardware. If you own a previous generation Countryman (roughly 2017-2024), your center console is a different beast entirely.
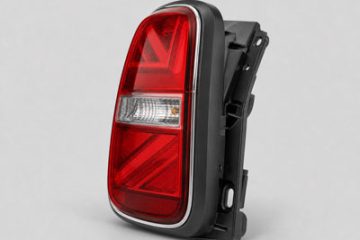
For those models (often the F60 chassis), the center console is a structural piece. If you ever need a replacement, you’ll likely be searching for the OEM part number 51169370984 . This part covers the main tunnel structure for several years and is a genuine Mini OEM assembly. For even more specific internal components, like the tunnel element for the F60 Cooper, you might look at part 9332830 .
Here is a quick comparison to show you how dramatically the center console experience has changed between the previous generation and the all-new model:
Why the “Mini Experience Modes” Matter
One of the key insights into this new console is how it plays with the Mini Experience Modes. Using the toggle on the center console, you can switch between modes like “Core,” “Green,” “Vivid,” and “Timeless.”
This isn’t just a driving mode; it’s a sensory overhaul. The OLED screen changes its graphics, but so does the ambient lighting projected onto the knitted dashboard. The vehicle even generates specific driving sounds to match the vibe . It turns the center console from a mere control panel into the remote control for the entire cabin’s personality.
Is the Switch Worth It?
So, what is the implication of this dynamic shift? Mini is betting big on “Charismatic Simplicity”—the idea that removing clutter and focusing everything into one beautiful interface makes driving more engaging .
There are trade-offs. Critics have noted that the software can occasionally be laggy , and hiding climate controls inside a touchscreen can be less intuitive than physical buttons. However, the build quality remains top-tier. The new materials, including recycled textiles and the FSC-certified wood options for the console area (available in other BMW group models), elevate the cabin to a premium level .
Conclusion
The new Mini Countryman centre console is a conversation starter. It rejects the standard layout of “two screens on top of each other” that we see in most luxury cars today and instead opts for a singular, bold focal point.
While the previous generation (utilizing parts like 51169370984) offered a more traditional, storage-heavy layout, the 2025 model (with its Mini OS9 interface) offers an experience. It’s futuristic, it’s fun, and thanks to features like the “Hey Mini” voice assistant (voiced by Spike the dog), it feels like you have a co-pilot rather than just a car .
If you’re looking for maximum storage, the old guard might win. But if you want the coolest, most tech-forward interior in the subcompact luxury segment? The new circular OLED is absolutely the way to go.
How To Remove Centre Console Mini Countryman R60: A Complete DIY Talk Through
So, your Mini Countryman R60 centre console is looking a little tired. Maybe the cup holders have given up, perhaps the storage compartment latch is broken, or you’re chasing a mysterious rattle that’s driving you up the wall. Or maybe—just maybe—you’re planning to wrap that silver trim in something a bit more exciting.
Whatever your reason, pulling apart the interior of your beloved Mini can feel intimidating. But here’s the thing: the centre console on the R60 (that’s the first-generation Countryman, produced from 2010 to 2016) is actually a very logical piece of engineering. It comes apart in a sequence that, once you understand it, makes perfect sense.
In this guide, we’ll walk through exactly how to remove the centre console on the Mini Countryman R60. We’ll cover the differences between manual and automatic versions, what tools you’ll actually need, and why knowing the correct repair procedures from sources like the official 51 16 165 Removing and Installing Complete Centre Console guide matters more than you might think.
Before You Start: Know Your R60
The R60 chassis covers a lot of ground. We’re talking about the Mini Cooper Countryman and the sportier Cooper S Countryman, produced roughly between 2010 and 2016. There’s also the JCW (John Cooper Works) version, which shares the same interior structure.
The key variable you need to identify before you even touch a screwdriver is whether your car has a manual or automatic transmission. This matters because the gear shifter assembly—and how you remove the trim around it—differs significantly.
Also, if your R60 is equipped with the optional Harmon Kardon sound system, there’s an amplifier located under the centre console. Disconnecting the battery before starting isn’t just a suggestion; it’s essential if you don’t want to trigger error codes or, worse, short something out.
Why Would You Remove The Centre Console Anyway?
Before we dive into the gritty details, let’s talk about why this is such a common job in the R60 community.
The centre console on these models houses several components that are known to wear out. The front cup holders, for instance, have a spring mechanism that can snap. Replacing them requires accessing part 51 16 200—the front cup holder assembly. Similarly, the storage compartment lid under the armrest can crack, and the rubberized coating on the trim pieces often becomes sticky and unpleasant over time.
If you’re chasing electrical gremlins—like a faulty USB port or a 12V socket that’s stopped working—accessing these connections usually means removing the console.
Tools You’ll Actually Need
Forget the fancy workshop setups. Here’s what you need for this job:
- Trim Removal Tools: Plastic pry tools are mandatory. Using a metal screwdriver will leave gouges in your interior that you’ll regret every time you get in the car.
- Torx Bit Set: The R60 interior is held together with Torx screws, typically T20 and T25 sizes. A set of Torx screwdrivers or a socket set with bits is essential.
- Flathead Screwdriver: For a few specific clips.
- 8mm Socket: For the bolts holding the seat belt anchors (if you need to move the seats).
- Patience: Honestly, this is the most important tool.

Step-by-Step Guide: Removing The Centre Console
The official BMW/Mini repair procedure for this job is referenced as 51 16 165 Removing and Installing Complete Centre Console. While we’re adapting this for the DIY enthusiast, following the logical flow of this procedure is key to avoiding broken clips.
Step 1: Disconnect The Battery
Pop the bonnet, disconnect the negative terminal of the battery, and wait about 10 minutes. This allows the airbag system capacitors to discharge. If you’re working near the gear shifter or the centre stack, this is non-negotiable.
Step 2: Remove The Rear Console Section
The centre console is actually two main pieces: the rear section (covering the rear air vents and storage) and the front section.
Start by pulling the rear seat vents trim. This usually pries off with a plastic trim tool. Underneath, you’ll find the bolts securing the rear console to the floor. Remove these, then disconnect the 12V power socket wiring if your model has rear power outlets.
Step 3: Address The Gear Shifter (This Is Where It Gets Tricky)
Here’s the crucial difference between models:
- Automatic Transmission: You’ll need to remove the gear shift knob. This typically requires carefully prying up the chrome bezel at the base, releasing a spring clip, and pulling the knob upward. It takes some force, but it must be straight up.
- Manual Transmission: The shift boot is usually clipped into the console. Carefully pry the frame of the boot upward. Once the boot is free, you can access the bolts underneath.
Step 4: Remove The Front Trim Panels
Moving to the front, you need to remove the side trim panels on either side of the console. These run along the driver and passenger footwells. They are held in by clips and a few screws near the dashboard. Once these are off, you can see the main mounting bolts.
There will be two bolts at the front of the console (under the dashboard lip) and two more towards the middle, near where the seats are. You’ll likely need to slide the front seats all the way back to access the rear bolts, and then slide them all the way forward to access the front ones.
Step 5: Disconnect The Wiring
Before you lift the console, check for wires. The centre console houses:
- The 12V power socket wiring
- The USB/Aux input wiring (if equipped)
- The parking brake switch wires (if you have the electronic parking brake on later models)
- The seat heater switches (if mounted on the console)
Disconnect these carefully. They often have locking tabs that need to be pressed down—never pull on the wires themselves.
Step 6: Lift And Remove
With all bolts removed and all wires disconnected, the centre console should lift up and out over the handbrake handle. It’s a tight fit, so wiggling is required. Guide it out towards the rear of the vehicle.
Comparison: Removing Front vs. Complete Console
Sometimes you don’t need to pull the whole console out. If you’re just replacing the storage compartment or cup holders, there are separate procedures that save time.
The official repair documentation references 51 16 200 Removing and Installing/Replacing Storage Compartment and 51 16 202 Removing and Installing/Replacing Front Cup Holder. These can often be done with the console still in the car, by removing just the upper trim panels.
Here’s a quick reference guide to help you understand which procedure you actually need:
| Component / Job | Official Repair Code | Console Removal Required? | Difficulty Level |
|---|---|---|---|
| Front Cup Holder Replacement | 51 16 202 | No – remove upper trim only | Moderate |
| Storage Compartment Replacement | 51 16 200 | No – remove upper trim only | Moderate |
| Centre Console Trim Replacement | 51 16 160 | No – trim removal only | Easy |
| Complete Console Replacement | 51 16 165 | Yes – full removal | Advanced |
| Handbrake Assembly Access | – | Yes – full removal | Advanced |
| Wiring Harness Repair | – | Yes – full removal | Advanced |
Key Insights: What Makes The R60 Unique
Having worked on a few R60 interiors, there are a few things worth noting that aren’t immediately obvious.
The Rubber Coating Issue
If your R60 is from the early 2010s, there’s a high chance the rubberized soft-touch coating on the console trim has started to degrade. It becomes sticky, collects dust, and feels unpleasant. Removing the console gives you the perfect opportunity to strip this coating off and either repaint the trim or wrap it.
The Parking Brake Clearance
One of the trickiest parts of reinstalling the console is maneuvering it over the manual handbrake lever. The trick is to have the handbrake pulled up as high as possible when lowering the console back into place. This gives you maximum clearance.
The Notorious Cup Holder Spring
The front cup holder assembly (reference 51 16 202) is a common failure point. The spring-loaded arms that grip your drink lose their tension. If you’re removing the console anyway, proactively replacing this part is cheap insurance.
Reassembly: Reverse Order
The old mechanic’s saying applies here: installation is the reverse of removal. However, a few tips make the process smoother:
- Test before bolting: Before you tighten all the bolts and clip all the trim back in, reconnect the battery and test the 12V socket, USB ports, and any seat heater switches. It’s much easier to diagnose a forgotten connection with the console loose than after it’s fully bolted down.
- Don’t over-tighten: The Torx screws go into plastic brackets. Over-tightening will strip the threads. Snug is sufficient.
- Align clips carefully: The side trim panels slot into specific grooves. If you force them, you’ll break the plastic tabs. If it doesn’t click in easily, realign and try again.
A Word On OEM Part Numbers
If you’re planning to replace components while you’re in there, knowing the correct part numbers saves a lot of headache. The centre console structure itself has a specific OEM part number depending on whether your car has the optional armrest or the standard open storage. For the R60, the main console body often falls under part numbers starting with 51 16 6 9xx xxx, but it’s always best to check your VIN with a dealer or genuine parts retailer.
For smaller components:
- The front cup holder assembly is commonly referenced as OEM part 51169837970 for the R60.
- The centre armrest storage compartment latch mechanism is a separate part that fails frequently—worth inspecting while you have it apart.
Final Thoughts
Removing the centre console on a Mini Countryman R60 isn’t a five-minute job, but it’s absolutely achievable for a competent DIYer with basic tools. The key is understanding the sequence, respecting the differences between manual and automatic models, and having the correct reference information on hand.
Whether you’re chasing a rattle, replacing a broken cup holder, or refreshing tired trim, taking the time to do this properly means you’ll have an interior that feels solid and creak-free when it all goes back together.
Just remember: follow the sequence from the official 51 16 165 procedure, use plastic trim tools, and don’t forget to disconnect that battery. Your interior—and your sanity—will thank you.