Settling In: A Guide to Mini Countryman Front Seats
There’s something distinctly charming about sliding into the driver’s seat of a Mini Countryman. It’s that perfect blend of British quirkiness and German engineering that makes you feel like you’re about to embark on an adventure, even if it’s just the school run. But let’s be honest—if you’re spending any amount of time in traffic or planning a road trip, the front seats aren’t just about style; they’re about survival. So, let’s take a closer look at what it’s really like to sit up front in this beloved crossover.
The First Impression: Sporty Meets Supportive
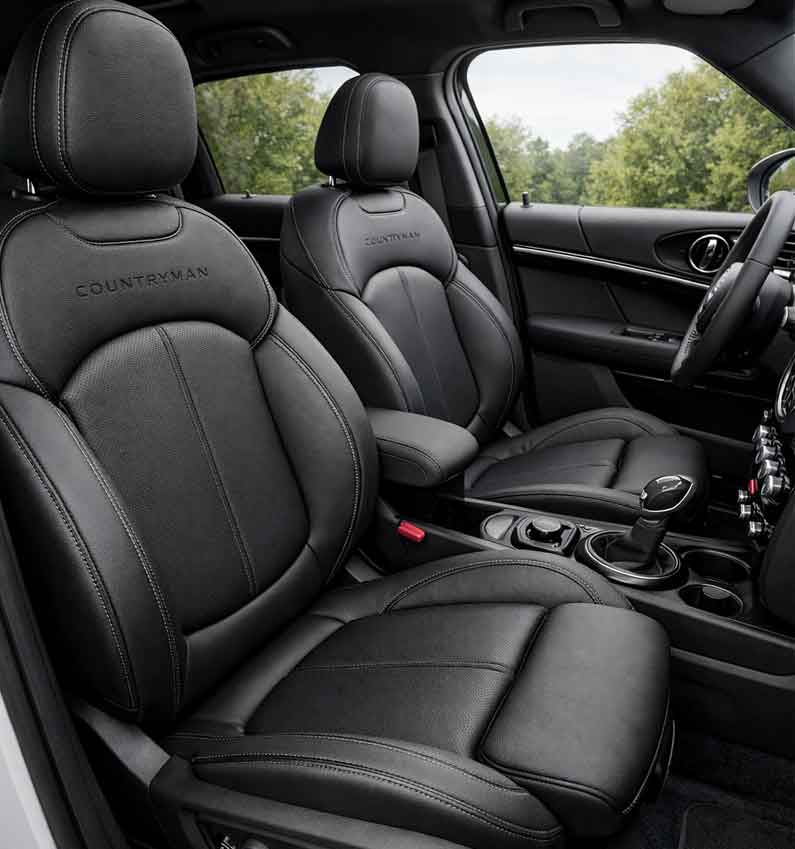
When you open the door of a current-generation model, you’re greeted by what can only be described as Sport Bucket seats . Right away, you notice they are designed to hold you in place. Whether you’ve opted for the standard trim or something plusher, the seats are generally wrapped in a combination of Vescin Cloth/leatherette or full-on leather, depending on the package .
In the 2024 models and beyond, Mini has really upped its game with sustainability. The new cabins feature materials made from recycled polyester, which sounds technical but feels surprisingly warm and pleasant to the touch . It’s nice to know that while you’re cruising, you’re also sitting on something that’s a little kinder to the planet.
For those who remember the first-generation R60 models (2010-2016) , the focus was always on the “go-kart” feel. The seats were firm—almost go-kart-like—to enhance that sporty connection with the car. If you own one of these and are looking to restore that factory-fresh support, genuine OEM parts are available; for example, the Front Left Seat Back Frame (Part #52109806631) is a direct fit for the 2011-2016 models .
Adjustability: Finding Your Sweet Spot
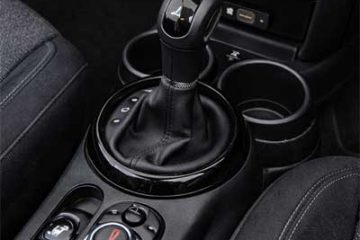
One of the biggest evolutions in the Countryman’s history is how much you can actually adjust the front seats. In the 2025 models, drivers are treated to 8-way power adjustments, while the front passenger gets 6-way controls . This means finding that perfect driving position is easier than ever, especially with the added lumbar support for both driver and passenger . It’s a godsend for those of us with finicky backs on long hauls.
If you look back at the 2020 model year, the base trims came with 6-way manual seats . It’s a classic case of evolution: what was once a standard manual operation has now become a high-tech, memory-enabled feature that even tilts the mirrors down when you reverse .
Here’s a quick look at how the seating specs have evolved over the years:
The Family Perspective: Space and Car Seats
Here is where the Countryman often surprises people. Because it’s a Mini, you expect it to be cramped. However, the reality is quite different. The car offers ample front headroom (40.5 inches) and legroom (40.4 inches) , ensuring even taller drivers don’t feel short-changed .
But what happens when you put a baby seat behind that front passenger seat? A recent 2025 Car Seat Check revealed an interesting dynamic. Installing a rear-facing infant seat is easy thanks to accessible Latch anchors, but it does impact front passenger space. A passenger around 5-foot-6 might find their knees getting cozy with the glovebox .
However, one dad shared his experience online, noting that he could easily fit a rear-facing baby seat behind the passenger seat while still leaving enough clearance for his spouse up front . The magic here lies in the 2025 model’s ability to recline and slide, making it surprisingly family-friendly for a “premium subcompact” .
The Verdict: A Throne Worth Sitting In
The Mini Countryman front seats have matured beautifully. They started as firm, sporty perches in the R60 generation and have evolved into tech-savvy, adjustable thrones in the U25 generation (2024-present) . They now offer a blend of sustainable luxury, practical adjustability, and surprising spaciousness that caters to everyone from the empty-nester to the new parent.
Whether you are navigating city traffic or tackling a winding country road, these seats are designed to keep you comfortable and in control. And really, isn’t that exactly where you want to be?

The A Guide: How To Remove The Front Seats From A Mini Countryman
Whether you’re behind the wheel of a first-generation R60 (2010-2016) or one of the latest U25 models (2024-present) , the process shares a common DNA. Yes, there are quirks depending on whether you have manual adjusters or full-electric, memory-function thrones, but with the right know-how, you can transform your cabin in an afternoon.
Let’s pop the hood—well, open the door—and get to work.
Why Would You Even Do This?
Before we dive into the grease and bolts, let’s talk about the “why.” Removing the front seats isn’t an everyday task, but when you need to do it, it’s a game-changer.
- Deep Cleaning: Let’s be real. Crumbs, coins, and who-knows-what-else disappear into the abyss between the seat rail and the center console. Pulling the seats gives you unrestricted access to vacuum every last Goldfish cracker.
- Sound Deadening: If you’re an audiophile, the Countryman’s cabin can benefit from some extra sound deadening material on the floorpan. You can’t do that properly with a 50-pound seat in the way.
- Custom Upholstery: Maybe those JCW cloth seats are starting to show wear, or you’re swapping in a set of heated leather buckets from a higher trim level.
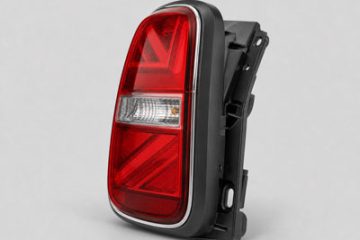
- Component Access: The fuel pump access panel is located under the rear seat on many models, but for wiring runs or amp installations, having the fronts out is a massive help .
Safety First: The Battery is Your Enemy (For Now)
We need to have a serious talk about safety. Modern cars are rolling computers, and the Mini Countryman is no exception. Buried under that seat are likely the wiring harnesses for the occupancy sensor, seat heaters, and—the big one—the airbag system.
Step zero: Disconnect the battery. Seriously. Do not skip this. You need to prevent the SRS (Supplemental Restraint System) from thinking it’s being deployed. Wait at least 10-15 minutes after disconnecting the negative terminal before you start touching any connectors. This allows the system’s capacitors to drain. We want to keep the airbags in the steering wheel, not setting them off on the garage floor.
Tool Up: What You’ll Need
Grab your toolkit. You won’t need a full workshop, but having the right gear makes all the difference.
- Socket Set: Specifically, you’ll likely need E-Torx sockets (External Torx) or standard Torx bits. The seat bolts are usually heavy-duty.
- Extensions: A long extension for your ratchet will save your knuckles.
- Trim Removal Tools: Plastic pry tools to pop off plastic covers without scratching everything.
- Permanent Marker or Labels: For marking wires.
- A Friend (Highly Recommended): These seats are heavy, awkward, and expensive to drop.
The Step-by-Step Removal Process
Okay, you’ve prepped the car, the battery is dead, and your tools are laid out. Let’s get those seats out.
Step 1: Slide and Reveal
Move the seat all the way forward. Then, move it all the way back. Why? Because you need access to the front and rear mounting bolts. On the R60 models, the bolts are usually exposed, but on newer cars, you might need to slide plastic covers out of the way to reveal the mounting points.
Step 2: The Bolt Battle
Under those plastic caps, you’ll find the bolts securing the seat frame to the chassis. This is where variations pop up.
- Manual Seats: Generally straightforward. Four bolts (two front, two rear) hold the seat to the floor.
- Electric Seats: The same bolt pattern applies, but there will be a wiring harness you need to disconnect after the seat is loose.
Use your E-Torx socket to break the bolts loose. Warning: These are often torqued down tight at the factory. Use steady pressure so you don’t strip the head.
Here’s a reference for the general layout:
| Component | Typical Location | Tool Required | Notes |
|---|---|---|---|
| Bolt Covers | Front and rear of seat rails | Trim Tool | Pry gently to avoid breaking clips |
| Mounting Bolts (x4) | Under covers, into chassis | E-Torx / Torx Socket | Often requires long extension |
| Wiring Harness | Underneath seat | None (Hands) | Disconnect after battery is off |
| Airbag Connector | Underneath seat (Yellow) | None (Hands) | Usually a safety clip/lock; handle with care |
Step 3: The Electrical Tango
Once the bolts are out, do not just yank the seat out. Tilt the seat back slightly. Look underneath. You’ll see a bundle of wires.
On the 2020 models and beyond, there are more electronics than ever—memory modules, lumbar pumps, and heating elements. Disconnect these harnesses carefully. The airbag connector is usually bright yellow. There is often a small slider or tab you need to release before it will unplug. Do not force it.
Step 4: The Awkward Lift
Here is where that friend comes in. The seat is now loose, but it’s also heavy and has sharp metal rails that want to scratch your center console and door sills.
Tilt the seat backrest forward as far as it will go. This changes the center of gravity and makes it easier to maneuver. Lift the seat up and out, angling it so the rails clear the sill plates. Slide it out the door opening and place it on a soft surface (like an old blanket) to protect the upholstery.
Comparing Generations: R60 vs. U25
If you’ve done this job on an older car and are trying it on a new one, you might notice some differences. The engineering philosophy has shifted.
In the first-generation R60 models, the process feels very mechanical. You have four bolts, maybe a single wiring plug for the seat belt tensioner, and you’re done. It’s raw and simple .
On the current 2024/2025 U25 models, the seats are heavier. They are more integrated with the car’s CAN bus system. While the physical removal is the same, you have to be more mindful of the wiring. There are more modules under the seat than ever before, and they are sensitive to static and rough handling. However, the space in the footwell is slightly larger, ironically giving you a bit more room to work despite the extra tech.
Key Insights and Implications
So, what did we learn from all this?
First, patience is a virtue. Rushing the electrical disconnection can lead to a hefty bill at the dealership to reset airbag lights.
Second, generation matters. If you own a 2014 R60, your main concern is rust on those bolts. If you own a 2025 model, your main concern is the sensitive electronics under the seat.
Finally, access is liberation. Once those seats are out, you realize just how much space is actually in the Countryman. The floorpan is wide and flat, perfect for laying down a new carpet kit or running audio cables in a straight line.
Wrapping It Up
Removing the front seats from your Mini Countryman might seem like a job for a professional mechanic, but with a socket set, a little patience, and this guide, it’s well within the realm of a DIY enthusiast. Just remember to respect the electronics, label your parts, and lift with your legs.
Whether you’re deep-cleaning last winter’s salt out of the carpet or upgrading to a set of heated John Cooper Works seats, getting those front seats out opens up a world of possibilities. Now, go forth and make that interior your own.