BMW Z4 E89 Front Suspension Shock Absorbers
If you’ve ever driven a car with worn suspension and felt like you were piloting a boat across choppy water, you already understand what the front shock absorber is doing when it’s working properly. On the BMW Z4 E89, the front strut assembly is a coilover-style unit — meaning the shock absorber and coil spring sit together as one combined assembly on each side.
Its job is beautifully simple in principle: keep the tyre in contact with the road at all times. Every time you hit a bump, the spring absorbs the initial impact, and the shock absorber (technically a damper) controls the rebound, stopping the car from bouncing around like a rubber ball. Without it working correctly, your steering feels vague, your braking distances increase, and frankly the whole car just feels wrong.
On the E89, this matters even more than on a regular saloon because the Z4 is a two-seat roadster that’s genuinely designed to be fun to drive. BMW built this car to handle with precision, and the front suspension is a critical part of that character. A tired or failed unit doesn’t just make the car uncomfortable — it fundamentally undermines what the Z4 is meant to be.
[INSERT IMAGE: BMW Z4 E89 front suspension strut assembly location]
Standard vs. Adaptive: Two Very Different Animals
Eibach Electronic Suspension Module
Here’s where things get interesting, and where a lot of owners get caught out when buying replacement parts. The E89 Z4 came in two distinct suspension flavours. Most cars left the factory with conventional passive spring struts — these are your standard hydraulic damper units with no electronic involvement whatsoever. They do their job quietly and reliably, and replacement parts are widely available from quality aftermarket brands like Bilstein and Sachs.
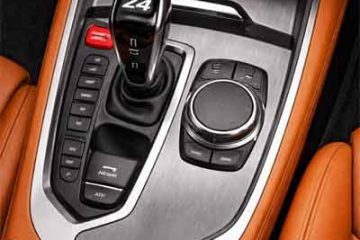
Then there’s the EDC (Electronic Damper Control) version, fitted to the higher-spec 35i and 35is models, often badged as M Adaptive Suspension or Dynamic Driving Control. These units contain an electronically controlled valve inside the damper that adjusts the damping rate in milliseconds based on inputs from the car’s sensors and the driver’s chosen driving mode — Comfort, Sport, or Sport+. The EDC connector plug lives in the engine bay right next to the strut housing, clipped upside-down and easy to miss if you’re not looking for it.
The critical thing to know is that these are completely different parts requiring different part numbers, and OEM EDC units are significantly more expensive than standard replacements. Before you order anything, check your VIN using a decoder (mdecoder.com is useful for this) to confirm exactly which spec your car left the factory with.
When It’s on the Way Out
The classic sign is oil weeping from around the damper body — a dark, oily film on the outer casing is a clear indicator the internal seals are gone. But most owners notice the symptoms long before they spot the visual evidence. The car starts to feel bouncy over crests, the front end dives more than usual under braking, and there’s a general woolliness to the steering that wasn’t there before.
Tyre wear is another dead giveaway that many people miss. If you’re seeing scalloped or cupped wear — a wavy, uneven pattern around the tyre’s circumference — that’s the tyre literally bouncing off the road surface at speed. Clunking over speed bumps is the obvious one, but pay attention to knocking sounds during cornering too, as this can indicate the top mount bearing has collapsed. On the E89, the rubber top mount gaskets are known to perish, and replacing them at the same time as the strut is strongly advisable.
Generation Variants at a Glance
| Variant | Spec Type | Typical Use Case | Est. Replacement Cost (per corner, parts only) |
|---|---|---|---|
| Z4 20i / 28i (standard) | Passive hydraulic strut | Daily driving, light sport use | £90–£160 (Bilstein/Sachs) |
| Z4 35i / 35is (standard strut) | Passive hydraulic strut | Sport driving on non-EDC cars | £90–£160 (Bilstein/Sachs) |
| Z4 35i / 35is (EDC adaptive) | Electronically controlled damper | Sport/Comfort mode selection via DDC | £600–£900 (OEM only, per corner) |
| All variants (full OEM BMW) | OEM BMW original spec | Full factory restoration | £200–£350 (standard) / £700–£900 (EDC) |
Part Numbers and What to Buy
For standard (non-EDC) cars, the OEM BMW front shock absorber reference is 31316784917 for the left side. Quality aftermarket alternatives include the Bilstein B4 (part number 22-183897 for front left, 22-183903 for front right), which are direct OEM-equivalent replacements priced around £95–£100 each. For EDC-equipped cars, the OEM references are 37116792891 (left) and 37116792892 (right), also cross-referenced as 37116792835/37116792836 in some listings.
When buying, new OEM or Bilstein B4 is the safe choice for most owners. Remanufactured units are less common for this application and generally not recommended for a sportscar that’ll be pushed. Avoid cheap, unbranded struts — the Z4’s suspension geometry is precise, and a poor-quality damper will give you a car that handles worse than a worn original.
The One Thing Most People Overlook
Mark your camber bolts before you touch them. The lower mounting on the E89 uses eccentric/camber adjustment bolts, and if you remove the strut without marking their position with a marker pen first, you’ll lose your front wheel alignment entirely. You’ll need an alignment afterwards regardless, but starting from roughly the right position means the tracking centre won’t be miles out when you drive to the alignment shop. Skipping this step on a rear-wheel-drive sports car with significant power is not a shortcut you want to take.
Removing the Front Shock Absorber on Your BMW Z4 E89 (2009–2016): A Practical Step-by-Step Guide
What This Guide Covers
This guide is specifically for the BMW Z4 E89 (2009–2016), covering both the standard passive strut and the EDC adaptive damper variant — noting the differences where they apply. The procedure is broadly the same for all engine variants (20i, 28i, 30i, 35i, 35is), though EDC-equipped cars have one additional step (the wiring connector) to deal with. This is a job most competent home mechanics can tackle with the right tools — but it does require a spring compressor, so read the whole guide before you decide whether to crack on or hand it over.
The EDC Wiring Connector: The Gotcha Most Guides Don’t Mention
If your Z4 has the Electronic Damper Control system, there is a wiring connector for the EDC module that connects at the top of each strut, tucked up inside the engine bay next to the strut housing. It’s clipped upside-down on the strut body, which means it’s virtually invisible unless you know to look for it. Disconnect this before you start loosening any suspension bolts — forget it, and you’ll find yourself with a connector ripped off its housing and a repair bill you didn’t budget for.
The good news is that unlike some adaptive suspension systems on other BMWs, no ECU coding is required when swapping like-for-like on the E89. Replace EDC struts with EDC struts, plug back in, and the system reads the new unit without any fuss. If you’re switching from EDC to a conventional passive strut (people do this to save money on replacements), you will need to code out the EDC system using something like an Eibach Pro-Tronic module or have it done via BMW diagnostic software, otherwise the dash will throw a persistent fault light.
Phase 1: Removal
Before you begin, you’ll need: Trolley jack and axle stands, 13mm socket and ratchet, 18mm socket and breaker bar, 22mm (or 21mm) socket for the top strut nut, spring compressor set (two-hook type), torx bits (T30/T40), marker pen, and an impact wrench if you have one.
- Loosen the front wheel bolts with the car still on the ground. Use a 17mm socket — the E89 uses standard BMW wheel bolts rather than nuts. Just break the torque at this stage; don’t remove them yet.
- Jack the car up and support it on axle stands under the sill jacking points. Never work under a car supported only by a trolley jack. Remove the front wheel completely.
- If your car has EDC, locate the wiring connector for the adaptive damper — it’s clipped to the top of the strut body, visible in the engine bay. Press the release tab and disconnect it now, before anything else.
- Mark the camber bolts with a marker pen on both the bolt and the surrounding metal at the lower mounting point on the hub carrier. This is your alignment reference. Take a photo too — phones are free and this could save you money at the alignment shop later.
- Disconnect the front anti-roll bar drop link from the strut. This is usually a 16mm or 18mm hex bolt with a T40 torx counter-hold on the end of the link stud to stop it spinning. If it spins freely, hold the stud with a torx bit while you crack the nut.
- Remove the two lower pinch bolts that clamp the strut into the hub carrier. These are typically 18mm hex bolts on the E89. These can be very tight — use penetrating oil the night before if you’re working on an older car. An impact wrench makes short work of them; without one, a long breaker bar is your friend. Note: these bolts should be replaced rather than reused.
- Support the hub carrier with a jack or a bungee cord to stop it dropping away. Once the lower pinch bolts are out, the strut will be free at the bottom. Wiggle the hub carrier to release it from the strut’s lower mounting. A flat-headed screwdriver used gently as a pry in the pinch slot will help open the clamp slightly.
- Go to the engine bay and loosen — but do NOT yet fully remove — the three 13mm nuts on the strut top mount at the tower. Leave the nut furthest from the car’s centre line in place loosely — this is your safety nut, stopping the whole assembly dropping on you.
- Attach your spring compressors to the coil spring, positioning the hooks evenly at roughly 180 degrees apart. Compress the spring gradually and evenly until there’s visible clearance (about 10–15mm) between the spring and its upper seat. Do NOT over-compress — just enough to relieve tension.
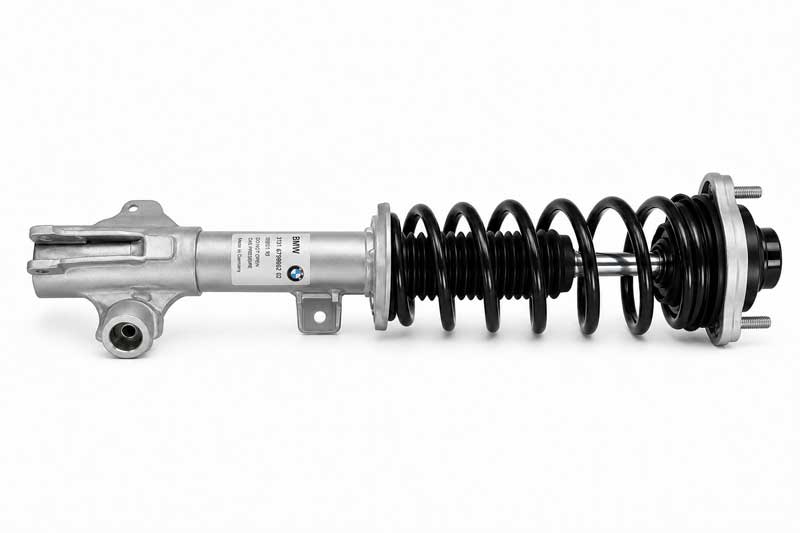
- Hold the assembly steady (a second pair of hands here is genuinely useful) and remove the remaining two 13mm top mount nuts. Now carefully remove the final nut while supporting the weight of the strut from below. The assembly should lower out through the wheel arch. It’s heavier than it looks — maybe 8–10kg with the spring compressed.
[INSERT IMAGE: BMW Z4 E89 strut assembly removed showing top mount and spring]
- To disassemble the strut from the spring: With the spring compressors still in place, use a 22mm socket on the top of the strut rod (some variants need a special Torx socket — check before you start) and an open-ended spanner on the hexagonal flat of the rod beneath the top nut to stop it spinning. Remove the top nut, then carefully release the spring tension by gradually unwinding the compressors.
- Inspect everything while it’s apart: The top mount bearing (the thrust bearing between the spring seat and the mount) is a known wear item. If it’s rough or stiff to turn, replace it. The rubber bump stop and dust gaiter are cheap — replace them at the same time.
Torque Specifications
| Component | Fastener Size | Torque (Nm) |
|---|---|---|
| Wheel bolts | M12 x 1.25 | 120 Nm |
| Strut top mount nuts (3x to strut tower) | 13mm | 35 Nm |
| Strut rod top nut (to bearing plate) | 22mm | 64 Nm |
| Lower strut-to-hub carrier pinch bolts | 18mm | 81 Nm + replace bolt |
| Anti-roll bar drop link to strut | 16–18mm | 58 Nm |
Note: The lower pinch bolts are single-use stretch bolts on some E89 variants — always use new bolts on reassembly. Check with your parts supplier.
Phase 2: Installation
Installation is largely the reverse, but there are a few things that are worth calling out specifically because doing them wrong will cause you a headache.
When fitting the new strut into the spring, make sure the lower spring seat locating peg aligns correctly with the recess in the spring coil. It only goes one way, but it’s easy to have it slightly off and not notice until you’ve torqued everything up and the spring is sitting crooked. Take a moment to confirm it’s properly seated before you release the compressors.
When offering the assembled strut up into the car, the studs on the top mount need to locate into their holes in the strut tower. This is where an extra pair of hands is genuinely valuable — one person guiding the studs into position from inside the engine bay while the other supports the strut from below. Get all three nuts started finger-tight before you torque anything.
When refitting the lower pinch bolts, use new bolts (not the originals), and do not torque them up fully until the car is back on its wheels and the suspension is at roughly the correct ride height under load. Torquing suspension bolts with the wheels hanging in the air can introduce stress into the rubber bushes in the wrong position. Drop the car onto its wheels, bounce it a few times to settle the suspension, then torque the lower bolts to spec.
If your car has EDC, plug the wiring connector back in before you close the bonnet. Start the car and check that no fault lights appear on the dashboard. If you see a suspension-related warning, use an OBD scanner to read the code before assuming the worst — it may just be a connector that isn’t fully clicked home.
Regardless of how carefully you marked the camber bolts, you must get a four-wheel alignment done after this job. This is non-negotiable on a rear-wheel-drive car with a performance-focused suspension setup. Budget around £60–£100 at a specialist or a decent tyre shop.
Is It Worth Doing Yourself?
Let’s be honest about the numbers. A pair of quality front struts (Bilstein B4, non-EDC) will cost you around £190–£200 for both sides. A professional garage will typically charge £250–£400 in labour for the pair, plus alignment at around £80, so you’re looking at £520–£680 all-in at an independent specialist. Doing it yourself brings that down to roughly £280–£320 including new bolts, a fresh alignment, and consumables — so you’re saving a meaningful £200–£350.
For EDC cars, the maths is different. If you’re replacing like-for-like with OEM EDC struts, the parts alone are around £1,200–£1,800 for the pair, and most owners sensibly hand that job to a specialist who can confirm the system is functioning correctly afterwards. If you’re switching to passive struts and coding out the EDC, the savings are bigger but the job is more involved.
The spring compressor is the one tool you really need that most home mechanics don’t already own. You can hire one from most motor factors for around £15–£25 a day, which makes the DIY route even more sensible.
Difficulty Rating: 3/5 Spanners
Straightforward in principle, but the spring compressor work requires care and confidence — rush it, and you’re dealing with a released spring under serious tension.