Is Your Ford Fiesta Trying to Tell You Something? A Friendly Guide to It’s Alternator Health
most of us don’t think about our car’s alternator until the moment we turn the key and are met with a soul-crushing click… or worse, silence. We just expect the lights to turn on, the radio to play, and the phone to charge. But hidden deep in the engine bay, that little generator is working overtime to make it all happen.
If you’re driving a Ford Fiesta—whether it’s a classic MkII or a sleek 2019 model—understanding your alternator can save you from a roadside meltdown. So, grab a coffee, and let’s talk about the unsung hero of your hatchback.
The “Smart” (and Slightly Picky) Alternator
Here is something fascinating: modern Fiestas aren’t just simple “plug-and-play” machines anymore. If you own a 2003-onwards Ford Fiesta 1.4 (or the Mazda 2 sibling), your car is likely fitted with a three-pin ECU-controlled alternator. In the industry, they often call this the “Ford Smart Charge” system .
Sounds fancy, right? It is… but it comes with a quirk. According to rotating electrics experts Autoelectro, these systems can be surprisingly particular about battery types. If your Fiesta is equipped with this system (look for part numbers like AEC1777), it specifically requires a silver calcium battery. If a standard lead-acid battery is fitted instead, the alternator won’t function correctly and can throw a discharge fault .
So, if your Mk5 or Mk6 Fiesta is acting up electrically and you’ve recently changed the battery, the issue might not be the alternator at all—it might be a simple (but crucial) battery mismatch.
Spotting the Signs: More Than Just a Dashboard Light
Usually, your first warning is the dreaded battery warning light glowing amber on the dash. But as with any long-term relationship, your Fiesta gives you subtle hints long before it leaves you stranded.
You might notice your headlights dimming or flickering when you’re idling at a traffic light . Maybe the interior lights seem a little weaker, or you hear a grinding or whining noise coming from the front of the engine . That noise is often the sound of worn-out internal bearings or a failing clutch pulley—a common issue on modern alternators as they try to dampen vibration from the engine .
Most standard Fiesta alternators are built to last, but they are mechanical. They have moving parts—rotors, stators, and bearings—and eventually, things wear out .
A Tale of Two Fiestas: Comparing the Generations
Here’s where things get interesting. Not all Fiesta alternators are created equal. The difference between a 1990s model and a 2010s model is massive, not just in technology but in cost.
I’ve put together a quick comparison based on market data to show you just how much variation there is:
Note: Prices vary wildly based on engine type (the 1.0L EcoBoost is notoriously tight on space) and whether you go to a local garage or a main dealer .
Part Numbers, OEMs, and What to Buy
If you’re the handy type and plan to swap it yourself (hats off to you—Fiesta alternators are usually quite accessible), you need to know your part numbers.
For that 2002-2005 Fiesta Mk6 Phase 1, a common OEM number is 1506300 . However, this single number crosses over to what feels like a million other codes, including 6G9N-10300-XA and AV6N-10300-GC, usually manufactured by Valeo .
If you have a 2011 to 2019 Fiesta, you’re likely looking at a high-output unit. A popular aftermarket option is the TRQ ALA90176, which boasts 120 amps and a 6-groove serpentine pulley to handle all that modern tech . Meanwhile, older models (like the 1998-2003) often used a WAI Global unit (23067N) with a simpler internal fan design .
Pro Tip: Always check the “grooves” on your pulley. A 70s-era Fiesta might have a single V-belt, but modern ones use multi-groove serpentine belts .
The “Burning Rubber” Red Flag
Here is one final thought. If you ever smell something like burning rubber or notice a squealing sound when you accelerate, don’t just assume it’s the tires. That could be the alternator belt slipping . If the belt slips, the alternator doesn’t spin fast enough to charge the battery. Ignoring it can lead to a dead battery, or worse, a snapped belt that could cause chaos under the hood.
The Bottom Line
Your Ford Fiesta is a tough little car, but it relies on a steady flow of juice. Whether you’re dealing with a “Smart Charge” system that demands the right battery, or a high-output unit for a tech-filled interior, knowing what’s under the bonnet makes all the difference.
If your lights are dimming or that battery light flickers, don’t panic. Check your battery type first, listen for noises, and if in doubt, grab a multimeter. You should see 13.8 to 14.4 volts across the battery terminals with the engine running . If you don’t… well, you know what to do.
How To Remove A Ford Fiesta Mk7 Alternator (Without Losing Your Mind)
Before you start dialling the nearest garage and bracing for a four-figure bill, let’s talk about Plan B. The Ford Fiesta Mk7 (specifically the 2008-2017 models) is actually a pretty decent car to work on at home. The alternator isn’t buried under the intake manifold like in some German cars. It’s accessible. You just need to know the dance steps.
I’ve scoured the forums, the guides, and the garage manuals to bring you the definitive, real-world guide to removing that alternator. This isn’t a sterile textbook procedure; this is the stuff the Haynes manual forgets to tell you.
The Usual Suspect: Identifying Your Mk7
First things first, let’s get specific. The Mk7 Fiesta had a huge range of engines, from the tiny 1.0L EcoBoost to the 1.6L Ti-VCT. The procedure I am going to walk you through is based on the most common variant in the wild: the 1.25L Duratec (2008-2013) .
If you have the 1.0L EcoBoost, the access is much tighter, but for our purposes, we are tackling the petrol 1.25. It’s a simple, robust engine, and removing the alternator here is a perfect weekend project.
The Stretch Belt: The “Secret Sauce” of This Job
If you take one thing away from this guide, let it be this: the Mk7 uses a stretch belt, not a traditional tensioner belt. .
On older cars, you’d have a spring-loaded tensioner arm. You’d stick a breaker bar on it, pull it back, and the belt would slip right off. On the Mk7, the belt is a specific size that “stretches” over the pulleys and holds tension by being slightly smaller than the path it travels. This is great for saving weight and cost at the factory, but it’s a headache for the home mechanic.
Do not try to just pry this belt off with a screwdriver. You will damage it. You need a specific stretch belt installation tool or a long 18mm socket to rotate the crankshaft and guide the belt off/on . We’ll get to that.
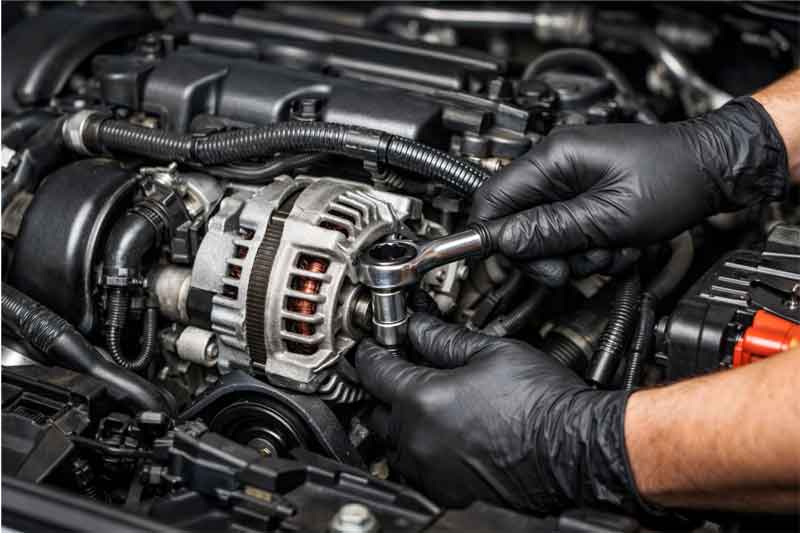
How To Remove The Alternator: A Step-by-Step Guide
Let’s get our hands dirty. Here is the most accurate method, distilled from the experiences of those who have been there and broken the knuckles to prove it .
Phase 1: Preparation and Disassembly
1. Safety First (Seriously): Pop the bonnet and disconnect the negative terminal of the battery using a 10mm spanner. Secure the cable away from the terminal . We are dealing with the main power lead to the alternator here; you do not want a spanner to bridge the gap and create a fireworks show.
2. Lift and Remove: Crack the wheel nuts on the front passenger side (offside) wheel while the car is on the ground. Jack up the front corner securely and place it on an axle stand. Remove the wheel .
3. Access the Splash Guard: Once the wheel is off, you will see a plastic splash guard covering the crankshaft pulley. This is held in by two T27 Torx screws . Remove these and pull the guard out of the way. Now you have a clear view of the crank pulley and the belt path.
4. Loosen the Alternator Bolts (Crucial Order): At this point, do not remove the belt yet. First, we need to free the alternator.
- Locate the 15mm pivot bolt underneath the alternator, towards the top of the engine .
- Locate the 15mm bolt and 15mm nut on the front of the alternator.
- There is also an E8 inverted Torx stud on the front .
- Loosen (but do not fully remove yet) these bolts. The goal here is to break the torque so the alternator can move.
5. Manoeuvre and Remove the Belt: Now, push or manoeuvre the alternator slightly so that you can slip the drive belt off the alternator pulley. With the alternator loose, there should be just enough slack to wiggle the belt free. Let the belt rest in the engine bay .
6. Disconnect the Electrickery:
- Pull back the rubber boot covering the main power terminal on the back of the alternator.
- Using a 13mm socket, remove the nut securing the positive wire. Remember which way it sits .
- Unplug the small wiring connector (the field coil connector). It usually has a tab you need to press to release it. Make sure you hear it click when you reconnect later .
7. Extract the Alternator: With all bolts loosened and wires disconnected, remove the 15mm bolts, the nut, and the E8 stud entirely. The alternator should now be free. You might need to wiggle it a bit, but it should come out through the bottom, usually via the wheel well access you created earlier .
Phase 2: Installation (The Reverse Shuffle)
Putting the new alternator in is mostly the reverse of removal, with one major exception: the belt.
1. Position the New Unit: Place the new alternator in position. Hand-tighten the stud and bolts first. It is highly recommended to replace these bolts if they look worn, as they are under high stress .
- Reconnect the wiring plug (click it in!).
- Refit the positive wire and torque the 13mm nut to 20Nm .
- Refit the rubber boot.
2. The Belt Fitting “Dance”: This is where patience pays off. Do not fully tighten the alternator bolts yet. Keep them loose enough so the alternator can pivot, giving you slack.
- You need to feed the belt over the alternator pulley, around the air conditioning (AC) compressor pulley, and around the water pump pulley .
- Feed the belt half over the crankshaft pulley.
- Now, get your 18mm socket on the crankshaft pulley bolt.
- Fit the stretch belt guide tool to the crankshaft (if you have one; some people make do with carefully guiding with a trim tool).
- Turn the crankshaft clockwise. This will “screw” the belt onto the crank pulley. It will feel tight, but it should go. Once it’s on, turn the crank five more times to ensure the belt is fully seated in the grooves of every pulley .
- Visually inspect that all the ribs on the belt line up with the grooves on the crank, AC, and alternator pulleys.
3. Final Torque and Reassembly: With the belt correctly seated, you can now tighten the alternator mounting hardware. Torque the 15mm bolts and the stud/nut to 48Nm .
- Refit the crankshaft splash guard with the two T27 Torx screws.
- If you have a brake rotor, apply a tiny amount of copper grease (anti-seize) to the hub face where the wheel sits to prevent the wheel from welding itself on later .
- Refit the wheel, lower the car, and torque the wheel nuts to 110Nm .
- Finally, reconnect the negative battery terminal and torque the 10mm bolt to 25Nm .
Why Bother? The “Cost vs. Joy” Calculation
You might be looking at this list and thinking, “That’s a lot of steps.” You’re right. But let’s look at the economics.
According to recent market data, the average cost for a professional to replace an alternator on a Ford Fiesta can range from €327 for an older MkIII up to nearly €753 for specific MkIV variants . For a Mk7, you are likely looking at a bill well north of €400 when you factor in parts and the 1.5-2 hours of labour .
A new or refurbished alternator for the Mk7 can be bought for somewhere between €150 and €250 depending on whether you go for a brand like Bosch, Valeo, or a decent aftermarket brand . By doing it yourself, you are saving a significant chunk of change. That saving could buy you a very nice set of tools for the next job.
A Note on “Smart” Alternators
Before you rush out to buy a random alternator, there is one crucial insight you need to know about modern Fiestas.
Many Mk7 models, particularly those with Stop/Start technology or high electrical demands, are fitted with what’s known as a “Smart Charge” alternator (often LIN bus controlled) . These are not always a straight swap for a standard unit. They communicate with the car’s ECU to manage charging rates based on driving conditions and battery age.
If you buy a cheap, non-OE spec alternator for a Smart Charge system, you might find that it doesn’t charge correctly, or it throws a dashboard warning light. Always check your part number (like the 6G9N-10300-XA or similar) against the manufacturer’s specifications before buying.
The Verdict
Removing the alternator from a Ford Fiesta Mk7 is a solid 3/5 spanners on the difficulty scale. It’s not “oil change” easy, but it’s not “engine rebuild” hard either. The key is respecting the stretch belt and having the right socket sizes ready (10mm, 13mm, 15mm, 18mm, T27, E8).
Take your time, follow the torque settings, and you’ll have the satisfaction of firing up the engine and seeing that battery light disappear, knowing you saved the day—and your wallet.


