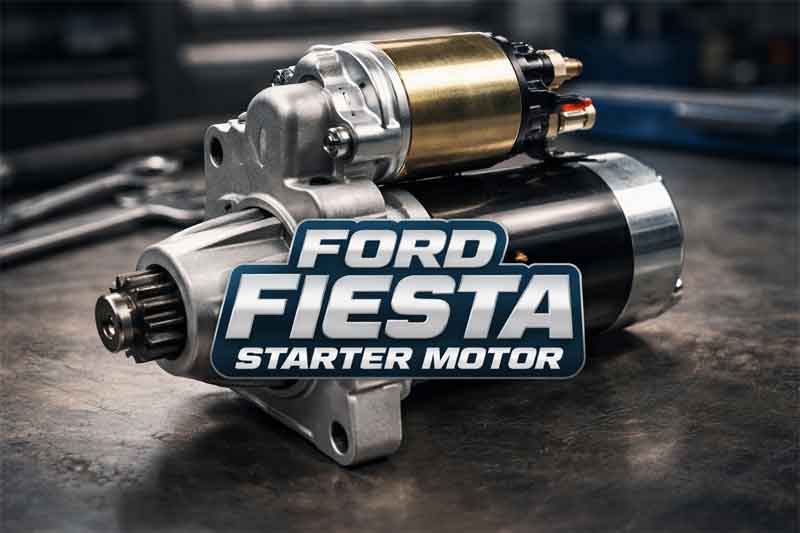
Guide to That Crucial Ford Fiesta Starter Motor
You slide into the driver’s seat, turn the key (or push the button), and instead of the reassuring hum of the engine, you’re met with a disheartening click… click… click. Your Ford Fiesta, usually so eager, is refusing to wake up. Before you panic, know that this is a classic sign of a struggling starter motor.
Think of the starter motor as the unsung hero of your daily commute. It’s a small but mighty electric motor tasked with the crucial job of getting the engine spinning so the combustion process can take over . When it starts to fail, it can throw a real wrench in your day. Let’s dive into the world of the Ford Fiesta starter motor, what to look for, and how to handle it when things go wrong.
The Tell-Tale Signs of Trouble
Your Fiesta is good at communicating; you just have to know what to listen for. According to experts, the most common symptom of starter failure across all makes and models is that dreaded single click when you turn the key, followed by an engine that refuses to turn over . You might also hear a strange whirring or grinding noise, which could indicate that the starter gear isn’t engaging properly with the engine’s flywheel .
It’s important to be a bit of a detective, though. Sometimes, the issue isn’t the starter itself but a weak battery or corroded connections. As one source points out, checking the battery terminals and wiring is a smart first step before condemning the starter . If your dashboard lights dim significantly when you try to start the car, that’s a big clue that the battery might be struggling to send enough juice to the starter .
A Look at the Hardware: Parts and Prices
If you’ve determined the starter is the culprit, you’ll need to look at replacements. The Ford Fiesta, spanning multiple generations, uses a variety of starter motors. It’s not a one-size-fits-all situation. For example, a starter for a 2008 Fiesta will differ from one built for a 2012 model. Using the correct part number is crucial to ensure the solenoid configuration matches your car .
To give you an idea of what’s out there, here’s a comparison of a couple of different options you might find:
As you can see, even the power output can vary slightly. A HELLA unit, for instance, offers 1.7 kW of power, a reliable brand often trusted by mechanics . Always match the part to your specific vehicle’s year and engine size.
The Cost of Getting Started Again
So, what’s this going to set you back? Naturally, costs vary based on where you live and the garage you choose, but we can look at averages to get a ballpark figure. According to recent data, the average cost for a Ford Fiesta starter replacement lands around £278.40 in the UK .
It’s worth noting that starters don’t last forever. Failure rates are low for the first 75,000 miles, but they increase significantly around the 125,000-mile mark . If your Fiesta is a high-mileage warrior, a starter issue shouldn’t come as a complete surprise.
A Final Thought: The Bigger Picture
While the starter motor is a common point of failure, it’s just one piece of the puzzle. The seventh-generation Fiesta (2008-2017) introduced the award-winning but sometimes problematic 1.0-litre EcoBoost engine . If you own one of these, it’s wise to be aware of other potential issues like cooling system problems or the infamous “wet belt” failure, which can have much more severe consequences than a starter motor .
For the vast majority of Fiestas, however, the trusty 1.25-litre Duratec engine (and its Zetec predecessor) is known for being robust and trouble-free when regularly maintained . In these models, a starter motor replacement is often one of the more significant repairs you’ll face in the car’s later life.

The Saturday Morning Project: Removing a Ford Fiesta Mk7 Starter Motor
There’s a special kind of silence that feels louder than any engine noise. It’s the silence you get when you turn the key in your Ford Fiesta Mk7, and instead of the familiar burst of life from the 1.25-litre Duratec or the quiet hum of the 1.6 TDCi diesel, you’re met with a single, pathetic click. Or worse, nothing at all.
We’ve all been there. You’re already late for work, or you’re standing in a supermarket car park with a boot full of shopping, and your car decides to play dead. While a flat battery is often the usual suspect, sometimes the culprit is a bit more mechanical: the starter motor.
If you’ve diagnosed the problem and confirmed the starter is to blame , you might be looking at a hefty labour bill at the garage. But here’s the good news: with a bit of patience and a basic set of tools, removing the starter motor on a Fiesta Mk7 is a job that’s well within the reach of a home mechanic. It’s a bit of a puzzle, but it’s a satisfying one to solve.
Before we get our hands dirty, it’s worth noting that the Mk7 platform (roughly 2008 to 2017) houses a few different hearts. A 1.4-litre diesel will have a different layout to a 1.0-litre EcoBoost . However, the general principle of accessing the starter remains surprisingly similar across the range. We’re going to focus on the most common layout here, but always cross-reference with a guide specific to your engine code if you can.
The Tools of the Trade
First things first, you can’t go into battle without the right weapons. For this job, you’ll need to assemble an armoury of sockets and extensions. Based on the experiences of those who have navigated this path before, here’s what you’ll likely need :
The Great Treasure Hunt: Locating the Starter
If you pop the bonnet and look at the engine, you might think, “I can’t see a starter motor anywhere.” And you’d be right. Ford didn’t make this easy. The starter is tucked away on the back of the engine, right up against the gearbox bellhousing. It’s a classic case of “build the car around the part.”
As one forum user pointed out, the official Haynes manual instructions can be surprisingly brief for a job like this . You have to be a bit of a detective. The secret to finding it is to stop looking at the engine and start looking at the space where the battery sits. That’s your gateway.
Step-by-Step: The Removal Process
Let’s break this down into manageable stages. Take your time, bag and label your bolts, and you’ll be holding the offending starter in your hands before you know it.
Phase 1: Clearing the Decks (The Engine Bay)
The battery and its associated tray are basically a fortress protecting the starter. They have to come out.
- Disconnect the Battery: Safety first! Disconnect the negative terminal first. We’re working with high-current cables to the starter, so you don’t want any accidental sparks.
- Remove the Battery: Lift it out and place it somewhere safe. Batteries are heavy, so be careful with your back.
- Extract the Battery Tray: This is where you’ll need your Torx bits. There are screws holding the tray in place. You might also find a metal box or bracket attached to the side of the tray . You can either disconnect the wiring from this box or undo the Torx screws holding the box to the tray. Removing the box with the tray can save a bit of time. Once the screws are out, lift the tray away.
- The Metal Bracket: Under the tray, there’s often an additional metal support bracket. This needs to come off too. Removing this bracket is the key that unlocks access to the top of the starter motor .
Phase 2: The Upper Assault
With the battery area cleared, look down into the void. You should now be able to see the top of the gearbox bellhousing. Somewhere in that aluminium landscape are the top bolts holding the starter in place.
- Locate and Remove Top Bolts: There are usually two bolts holding the starter to the engine block/gearbox that are accessible from the top . This is where your ratchet and extension bar come into play. Use a 10mm or 13mm socket (double-check the fit) to carefully undo these bolts. They can be tight, so a steady hand is required.
Phase 3: The Underworld (Working Underneath)
Now for the part that requires you to get low. Safely jack up the car and secure it on axle stands. Crawl underneath, locating the back of the engine where the starter lives.
- Disconnect the Wiring: This is a critical step. The starter has thick electrical cables connected to it. Usually, there’s a main power feed and a smaller trigger wire. Undo the nuts holding these wires onto the starter solenoid terminals. Remember which wire goes where! A quick photo with your phone can be a lifesaver here.
- The Final Bolt: There is one last bolt holding the starter in place, and it’s only accessible from underneath . Locate it and undo it with your ratchet or a spanner.
Phase 4: Extraction!
This is the moment of truth. The starter is now only held in by its own weight and a lifetime of grime.
- The “Handshake”: Reach up from underneath and grab the starter. You might need to wiggle it a bit to break the seal of dirt.
- The Route: Here’s a pro-tip from someone who learned the hard way: don’t try to drop the starter to the ground . There’s often not enough room. Instead, as you wiggle it free, guide it upwards. Feed it up through the gap you created by removing the battery tray. It feels like a magic trick the first time you do it, but it’s by far the easiest way to get it out of the car.
A Quick Note on Diesel vs. Petrol
While the process is broadly similar, be aware that the 1.4 Duratorq diesel engine is a different beast . The layout in the engine bay can be tighter, and the location of the starter might be slightly different due to the diesel’s heavier construction. Always check specific guides for the TDCi models, as access can be more challenging .
Before You Refit: A Moment of Reflection
With the old starter on your bench, take a moment to inspect it. You might see a lot of carbon dust or signs of wear. As one old-school mechanic noted, in the past, starters were often rebuilt—brushes replaced, commutators cleaned up . While that’s a dying art, it’s good to appreciate the mechanical simplicity of the part.
Now is also the perfect time to compare your old unit with the new one. Check that the mounting points are identical and that the nose cone matches. It’s much easier to fix a parts mismatch now than after you’ve wrestled the new one back into the car.
Refitting is, as they say, the reverse of removal. Offer the new starter up from the top, get it roughly in place, and then head underneath to start the bolts. It might fight you a little, but patience wins the day.
Once everything is bolted up and the wiring is reconnected, reinstall the battery tray and the battery itself. Then comes the best part: turning the key. That familiar, healthy roar of the engine starting is the sweetest sound you’ll hear all weekend. You’ve just conquered the Fiesta Mk7 starter motor.