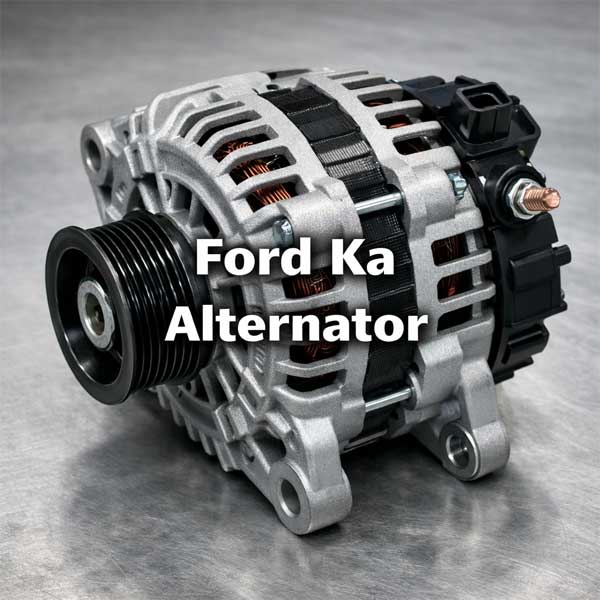
The Ford Ka Alternator: Your Little Car’s Powerhouse
Most of us don’t think about our car’s alternator until something goes wrong. That little battery warning light pops on the dashboard, and suddenly you’re wondering if you’ll make it home. If you drive a Ford Ka, you’re in luck. These spunky city cars are generally reliable, but like any vehicle, their electrical heart—the alternator—needs attention eventually. Let’s dive into what makes the Ka’s alternator tick, how to spot trouble, and what to do about it.
Spotting the Signs and Finding the Right Replacement
First, how do you know it’s the alternator and not just a dead battery? Classic symptoms include that dreaded red battery warning light, dimming headlights (especially at idle), strange electrical gremlins, and, ultimately, a car that just won’t start because the battery isn’t being recharged. If you’re experiencing this, it’s likely time for a replacement.
Now, here’s where it gets a bit specific. The Ford Ka, across its generations, used a couple of different engines, and the alternator specs changed with them. For the beloved first-gen (1996-2008) Ka with the trusty 1.3L Endura-E engine, a common OEM part number you might encounter is FINIS 1083553. The later second generation (2008-2016), which often featured a 1.2L Duratec engine, uses a different unit, such as part number 1426872.
When shopping, you’ll typically face three choices: brand new OEM, a new aftermarket unit, or a reconditioned alternator. Each has its pros and cons, which we’ve broken down for you below.
Your Replacement Options: A Quick Comparison
| ype | Pros | Cons | Best For |
|---|---|---|---|
| New OEM (Ford) | Perfect fit, maximum reliability, often comes with a warranty. | Most expensive option. | Owners wanting guaranteed, long-term reliability. |
| New Aftermarket | More affordable, good quality from reputable brands, often meets OEM specs. | Quality can vary between brands; requires research. | Cost-conscious buyers who research brands. |
| Reconditioned/Rebuilt | Most budget-friendly, eco-friendly option. | Reliability can be a gamble; may have a shorter lifespan. | Short-term fix or very tight budgets. |
A key insight here is that quality aftermarket brands like Bosch (who often supplied parts to Ford originally) or Valeo can offer excellent reliability without the premium price tag. It’s always worth checking the manufacturer’s specifications for amperage output (usually between 70-120A for the Ka) to ensure you get a unit that can handle your car’s electrical demands, especially if you’ve added accessories.
Keeping the Current Flowing: Maintenance and Insights
Here’s the good news: the alternator itself isn’t a regular maintenance item. It’s a “replace when it fails” component. However, you can extend its life by paying attention to its supporting cast. A failing tensioner or a worn serpentine belt can put extra strain on the alternator. A weak battery, struggling to hold a charge, can also force the alternator to work overtime, leading to premature failure. It’s a system, and when one part suffers, others feel the strain.
When it comes to the job itself, replacing an alternator on a Ford Ka is generally considered a moderate DIY task for the home mechanic, thanks to the car’s relatively simple engine bay layout. However, dealing with the drive belt tensioner can be tricky without the right tools. If you’re not comfortable, a trusted local mechanic can usually handle this job in a couple of hours. Websites like Euro Car Parts offer useful fitment guides and vehicle-specific parts to help you find the exact model you need.
So, while that blinking battery light might feel like a headache, think of it as your Ka’s way of asking for a little help. By understanding the signs, knowing your model’s specifics, and choosing a quality replacement part, you can easily restore your car’s spark and get back to enjoying the nimble, fun drive that made the Ka a city favorite. A little knowledge goes a long way in keeping your small car running with big reliability.
How to Replace Your Ford Ka Mk2 Alternator: A DIY Guide
So, your trusty Ford Ka Mk2 (that’s the 2008-2016 model) has given you the dreaded sign: the red battery light is glowing on the dashboard. Maybe the headlights are dimming at idle, or the car just won’t start. Before you panic and envision a huge repair bill, take a deep breath. Replacing the alternator on this little city car is a classic DIY job that can save you a significant chunk of money.
I’m here to walk you through it, not as a master mechanic, but as someone who believes that with the right guidance, a bit of patience, and the correct tools, you can absolutely do this. We’ll cover everything from confirming the problem to turning the key on your newly-revived Ka. Let’s get your car’s power back!
Is It Definitely the Alternator? Diagnosis First!
First things first – let’s make sure we’re fixing the right problem. A no-start condition or a battery light doesn’t always mean a dead alternator. It could be a failed battery, corroded terminals, or a bad serpentine belt. Here’s a quick pre-flight check:
- The Voltage Test: This is the gold standard. You’ll need a multimeter (a cheap one from an auto parts store works fine). With the engine off, measure the voltage across the battery terminals. A healthy, charged battery should read about 12.4 to 12.7 volts.
- Start the Engine: Now, start the car. Have your multimeter probes still on the battery terminals.
- The Crucial Reading: With the engine running, you should now see a voltage between 13.8 and 14.8 volts. This shows the alternator is charging. If you see 12.5V or less, or if the voltage dips when you turn on headlights and blowers, your alternator is likely the culprit. A great resource like Engine Fiesta has a detailed post on the specific charging system setup for these models.
If your tests point to the alternator, you’re in the right place. Time to gear up.
Gearing Up: Tools and Parts You’ll Need
You don’t need a professional workshop, but having the right tools makes this job infinitely easier and safer.
Tools:
- Basic socket set (metric, typically 8mm to 17mm)
- Ratchet with extensions
- A breaker bar (this is essential for the crankshaft pulley bolt)
- Torque wrench (highly recommended for reassembly)
- Jack and axle stands – never work under a car supported only by a jack!
- Gloves and safety glasses
- A small pry bar or flat-head screwdriver
The Replacement Part:
This is critical. The Ford Ka Mk2 came with two main petrol engines: the 1.2L (Duratec 8v) and the 1.3L (Duratec 16v). Their alternators are different. You must know your engine type.
- For the 1.2L 8v engine, a common and reliable OEM-style part number is 1426872.
- For the 1.3L 16v engine, you’ll need to look for a different unit, often referenced under part number 1524586.
You have three main choices when buying, and the right one depends on your budget and plans for the car:
| Part Type | Pros | Cons | Best For… |
|---|---|---|---|
| New OEM (Genuine Ford) | Guaranteed perfect fit and finish. Maximum longevity. | Very expensive. Often overkill for an older vehicle. | Purists or those planning to keep the car forever. |
| New Aftermarket (e.g., Bosch, Valeo) | Excellent quality, often from the original supplier to Ford. Great value. Good warranty. | Requires verifying fitment for your specific model year. | Most DIYers. The sweet spot of reliability and cost. |
| Reconditioned / Refurbished | Lowest upfront cost. | Reliability is a gamble. Core charge process can be messy. | Very tight budgets or a “quick fix” for a car you’re selling. |
I personally recommend a quality aftermarket brand like Bosch or Hella. They were likely the original manufacturers for Ford anyway. A reputable supplier like Euro Car Parts allows you to enter your registration number to ensure a perfect match.
The Step-by-Step Replacement Walkthrough
Alright, you’ve got your confirmed diagnosis, your new alternator, and your tools laid out. Let’s do this. Plan for a good 2-4 hours if it’s your first time.
Step 1: Safety & Preparation
- Park on a flat, solid surface.
- Disconnect the negative (black) terminal from the battery. This is non-negotiable. It prevents short circuits and protects you and the car’s electronics.
- Jack up the front right side of the car (passenger side for UK models, driver side for LHD) and secure it on an axle stand. You’ll need access from underneath.
Step 2: Gaining Access – The Serpentine Belt
The alternator is driven by the serpentine belt (also called the auxiliary drive belt). To remove the alternator, we must first remove this belt.
- From underneath, you’ll see the belt routing around the crankshaft pulley, alternator, and other components like the air conditioning compressor.
- The tension is held by an automatic tensioner. Using your socket and breaker bar on the tensioner’s center bolt, rotate it towards the engine (usually clockwise) to release the tension. You’ll feel it move. Once the tension is off, slip the belt off the alternator pulley and slowly release the tensioner.
- Pro Tip: Before removing the belt completely, take a picture of its routing! This is your cheat sheet for reassembly.
Step 3: Removing the Old Alternator
- Locate the alternator bolted to the engine block. You’ll see two main bolts: a long pivot bolt at the bottom and an adjustment bolt at the top (or vice-versa, depending on engine).
- Disconnect the electrical connectors. There will be a large main power cable (usually with a red cover) held by a nut (often 10mm or 13mm). Carefully remove this nut and pull the cable off. There will also be a smaller multi-pin plug. Press the tab and pull it straight out.
- Now, remove the mounting bolts. You may need to support the alternator as you remove the last one. Note the positions of any spacers or brackets – these are crucial for alignment.
Step 4: Installing the New Alternator
- Place the new alternator in position, reinstalling any brackets or spacers exactly as they were on the old unit.
- Hand-tighten the mounting bolts just enough to hold it in place.
- Reconnect the electrical connectors. The multi-pin plug first, then the main power cable. Ensure that power terminal nut is tight.
- Belt Routing Time: Use your photo reference. Loop the belt over all the pulleys except the alternator pulley. Use the tensioner tool again to release tension, slide the belt onto the alternator pulley, and ensure it’s seated correctly in all the grooves before releasing the tensioner.
Step 5: The Moment of Truth – Final Checks & Test
- Double-check that all bolts are snug and all electrical connections are secure.
- Reconnect the negative battery terminal.
- Start the engine. The battery light should illuminate briefly and then go out. That’s a good first sign!
- Grab your multimeter again. Test the battery voltage with the engine running. You should now see a beautiful 14.0 to 14.5 volts. Turn on your headlights, blower fan, and rear defroster. The voltage might dip slightly but should stay firmly above 13.5 volts.
If you’ve got that, congratulations! You’ve successfully replaced your alternator.
Key Insights & Navigating Common Hurdles
This job is straightforward in theory, but a few things can trip you up. Here’s the real-world insight you won’t always find in a manual:
- The Crankshaft Pulley Bolt: Sometimes, to get enough room to maneuver the alternator out, you might need to loosen or remove the crankshaft pulley bolt. This bolt is extremely tight (often torqued to over 100 Nm). This is where your breaker bar and a bit of force come in. Placing the breaker bar against a solid part of the chassis and briefly bumping the starter motor (with ignition disabled) is a common trick, but it carries risk. If you’re not comfortable, you can often wiggle the alternator out with creative angles instead.
- The Core Charge: If you bought a reconditioned unit, you likely paid a “core charge.” This is a refundable deposit you get back when you return your old, broken alternator (the “core”). Keep all your paperwork.
- Belt Tensioner Health: While you’re down there, inspect the belt tensioner pulley. Spin it by hand. If it grinds, rattles, or feels gritty, it’s wise to replace it now. A failing tensioner will destroy your new alternator belt quickly.
Conclusion: Was It Worth the Effort?
Replacing the alternator on your Ford Ka Mk2 is a immensely satisfying job. You’re not just saving on labour costs (which could easily be £150-£250); you’re gaining a deeper understanding of your car and the confidence to tackle future projects.
The key takeaways are simple: diagnose correctly, buy the right quality part for your needs, take your time, and never compromise on safety with the battery disconnected and the car properly supported.
So, the next time that little red light glows, don’t just see a problem. See an opportunity to get your hands dirty, learn a new skill, and give your Ka a new lease on life. You’ve got this